In this tutorial, I am going to show you how to develop a simple Java REST API tutorial using Springboot in Intellij
Idea IDE Ultimate edition 2023.1.2. The final product (i.e. source code) of this tutorial can be downloaded from
here.
The web application also includes a small Ajax-based front-end, but also an OpenAPI generated documentation that can be used
in order to consume the REST services of the application.
First, we create an empty Java project using Spring Initializr generator in IntelliJ Idea:
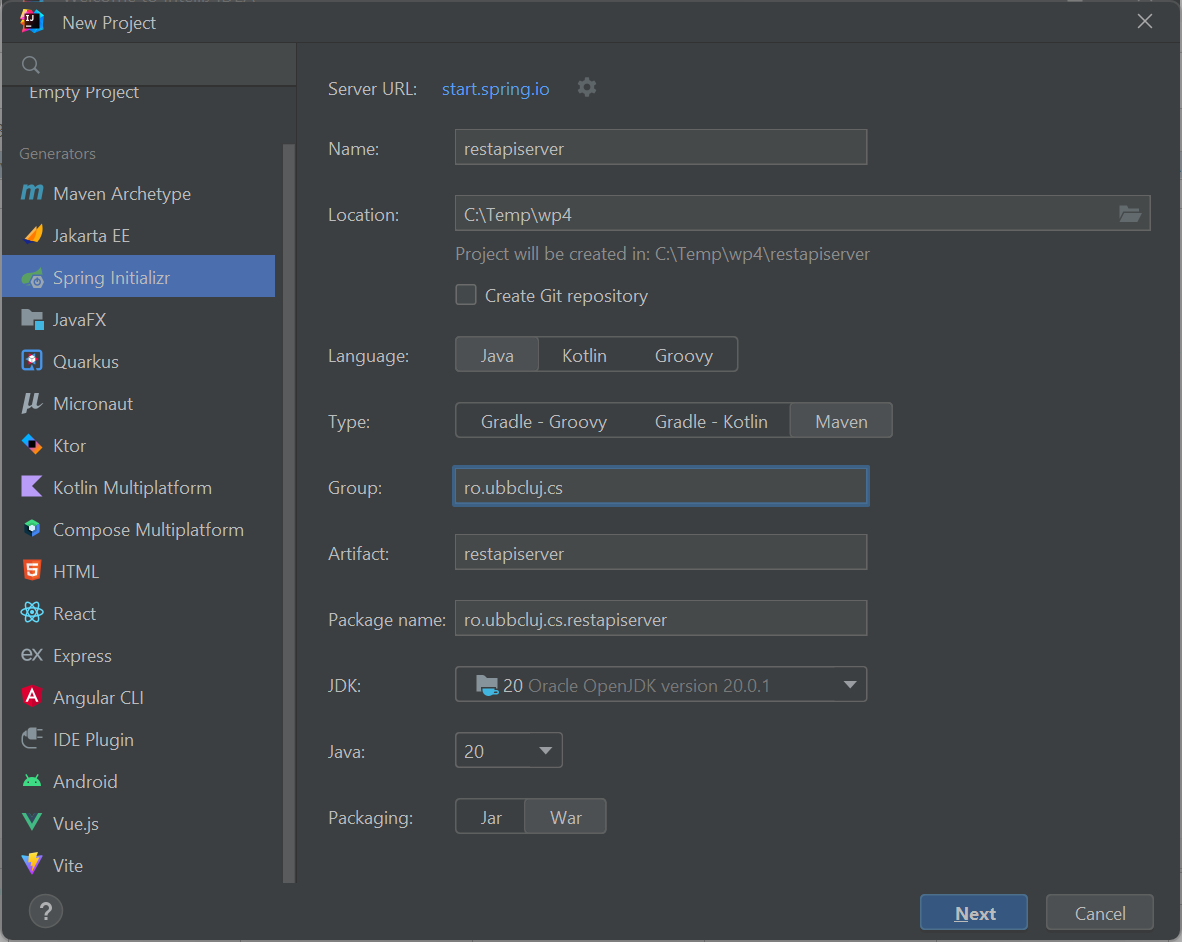
We choose Maven as the build system and War packaging; also we specify the JDK version, the package name (i.e. ro.ubbcluj.cs.restapiserver)
and the name of the artifact (i.e. restapiserver).
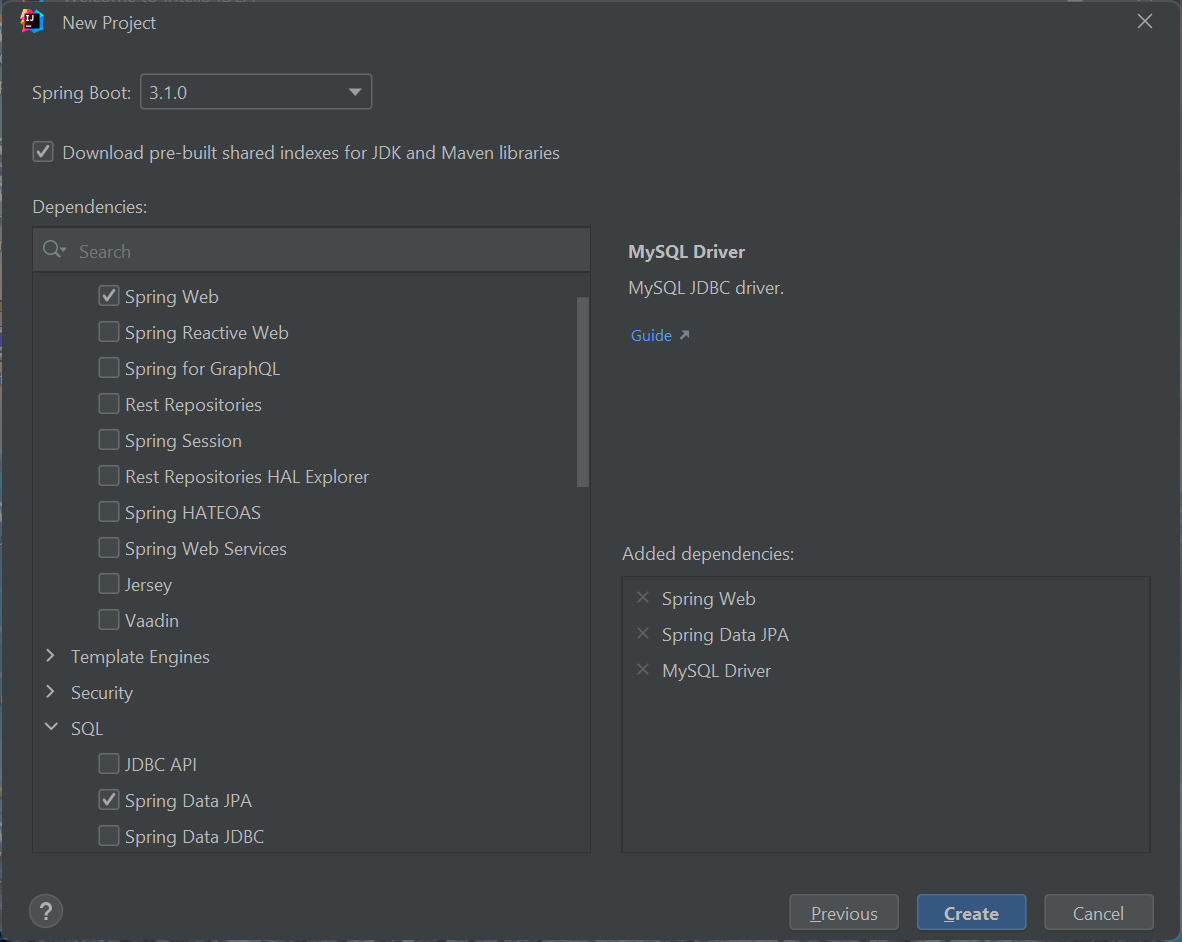
Next, we choose the SpringBoot version, latest 3.1.0 (please note that version 3 of SpringBoot only works with JDK 17 or larger
and similarly IntellyJ Idea requires a JDK larger than 17). We also check the dependencies: "Spring Web" under "Web" (because
we are building a RESTfull API) and "Spring Data JPA" (we want to use ORM) and "Mysql Driver" (we use a Mysql DB) under "SQL".
The content of the generated pom.xml file is the following:
		<?xml version="1.0" encoding="UTF-8"?>
		<project xmlns="http://maven.apache.org/POM/4.0.0" xmlns:xsi="http://www.w3.org/2001/XMLSchema-instance"
			xsi:schemaLocation="http://maven.apache.org/POM/4.0.0 https://maven.apache.org/xsd/maven-4.0.0.xsd">
			<modelVersion>4.0.0</modelVersion>
			<parent>
				<groupId>org.springframework.boot</groupId>
				<artifactId>spring-boot-starter-parent</artifactId>
				<version>3.1.0</version>
				<relativePath/> <!-- lookup parent from repository -->
			</parent>
			<groupId>ro.ubbcluj.cs</groupId>
			<artifactId>restapiserver</artifactId>
			<version>0.0.1-SNAPSHOT</version>
			<packaging>war</packaging>
			<name>restapiserver</name>
			<description>restapiserver</description>
			<properties>
				<java.version>20</java.version>
			</properties>
			<dependencies>
				<dependency>
					<groupId>org.springframework.boot</groupId>
					<artifactId>spring-boot-starter-data-jpa</artifactId>
				</dependency>
				<dependency>
					<groupId>org.springframework.boot</groupId>
					<artifactId>spring-boot-starter-web</artifactId>
				</dependency>

				<dependency>
					<groupId>com.mysql</groupId>
					<artifactId>mysql-connector-j</artifactId>
					<scope>runtime</scope>
				</dependency>
				<dependency>
					<groupId>org.springframework.boot</groupId>
					<artifactId>spring-boot-starter-tomcat</artifactId>
					<scope>provided</scope>
				</dependency>
				<dependency>
					<groupId>org.springframework.boot</groupId>
					<artifactId>spring-boot-starter-test</artifactId>
					<scope>test</scope>
				</dependency>
			</dependencies>

			<build>
				<plugins>
					<plugin>
						<groupId>org.springframework.boot</groupId>
						<artifactId>spring-boot-maven-plugin</artifactId>
					</plugin>
				</plugins>
			</build>

		</project>
We add the Spring JPA configurations in the application.properties file:
		# Spring JPA config
		spring.jpa.hibernate.ddl-auto=none
		spring.datasource.url=jdbc:mysql://${MYSQL_HOST:localhost}:3306/wp
		spring.datasource.username=root
		spring.datasource.password=
		spring.datasource.driver-class-name=com.mysql.cj.jdbc.Driver
		#spring.jpa.show-sql: true
Step 5. Run a Maven "mvn compile"
We run "mvn compile" so that Maven downloads all the necessary dependencies specified in the pom.xml and compile our source files.
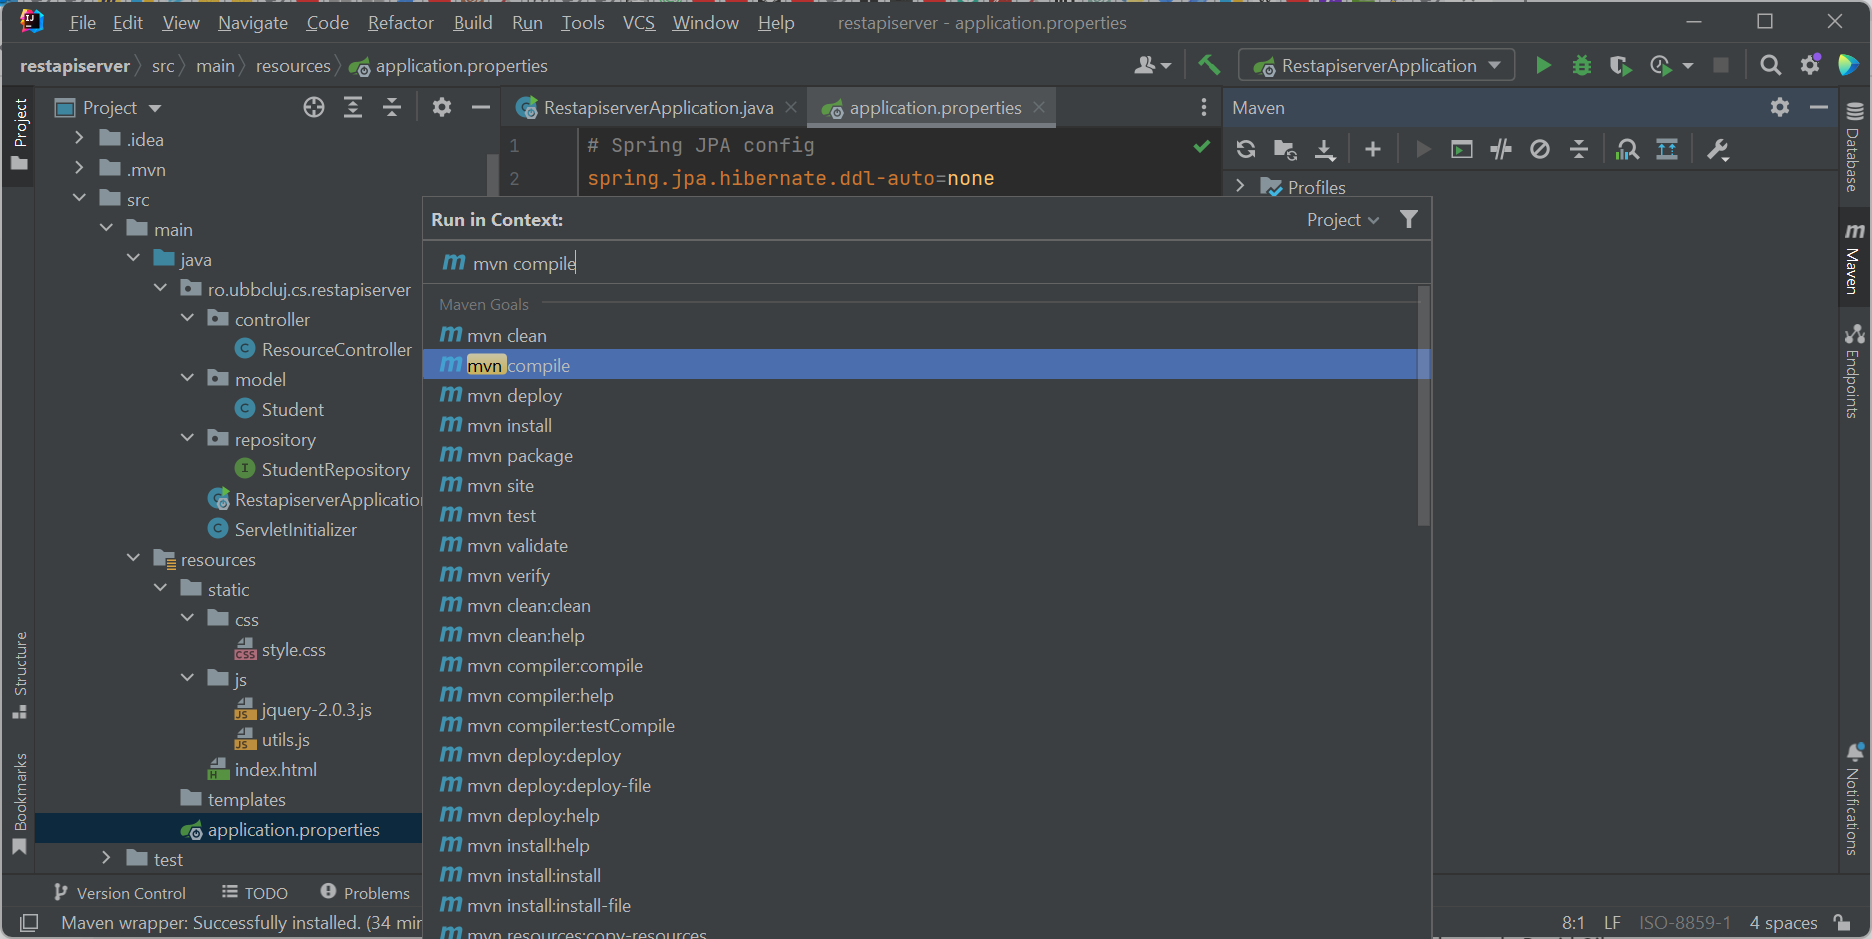
Normally, there shouldn't be any errors, but if there are in the majority of cases the error lies in a missing dependency in
the pom.xml Maven file.
Step 6. Run the SpringBoot application
Normally, IntelliJ Idea has automatically created a run configuration for us. If this is not the case, we should add a
run configuration in which we specify that the project should run on the local machine and the main class of the project is
ro.ubbcluj.cs.restapiserver.RestapiserverApplication.
Next, we should just run the application. Then, in the browser, if we go to http://localhost:8080/ we should see our simple Ajax-based front end.

Step 7. Add extra, optional dependencies: actuator
We can add Actuator to our dependencies. Actuator is a library that prints the configured web routes of the application
(i.e. the URL mappings). All we need to do is add the following dependency to pom.xml and then run "mvn compile" so that
the new dependency is downloaded and added to the project:
		<dependency>
			<!-- url is http://localhost:8080/actuator -->
			<groupId>org.springframework.boot</groupId>
			<artifactId>spring-boot-starter-actuator</artifactId>
		</dependency>
And when we run our web application, the url http://localhost:8080/actuator/mappings will print the available URL routes
of the web application.
Step 8. Add extra, optional dependencies: OpenAPI Springdoc
Instead of using the simple Ajax-based front-end for consuming the REST API we just created, we can generate HTTP requests for
consuming the REST API using OpenAPI Springdoc. All we have to do is add the following dependency to pom.xml, write additional
settings to application.properties and then run "mvn compile" so that the new dependency is downloaded and added to the project.
The new dependency that should be added to pom.xml is:
			<dependency>
				<groupId>org.springdoc</groupId>
				<artifactId>springdoc-openapi-starter-webmvc-ui</artifactId>
				<version>2.0.4</version>
			</dependency>
The additional settings that should be added to application.properties are:
			# Swagger OpenAPI doc config
			management.endpoints.web.exposure.include=mappings
			springdoc.swagger-ui.path=/swagger-ui.html
			springdoc.api-docs.path=/api-docs
			# The url-ul for Swagger is: http://localhost:8080/swagger-ui/index.html
			springdoc.packagesToScan=ro.ubbcluj.cs.restapiserver.controller
			springdoc.pathsToMatch=/v1, /student/**
If we run the SpringBoot application again, we can access in the browser the OpenAPI at this URL: http://localhost:8080/swagger-ui/index.html


